
Your Apple Watch is more than just a piece of technology – it’s a fashion statement. Whether you’re going for a workout, a formal event, or just daily wear, changing your Apple Watch band is one of the easiest ways to customize your look. But how exactly do you change an Apple Watch band? Let’s break it down step-by-step, so you can give your wrist a fresh, new look in no time.
- Understanding Apple Watch Band Types
- Tools You’ll Need
- Prepping Your Apple Watch for Band Replacement
- How to Change the Apple Watch Band (Step-by-Step)
- How to Remove Different Types of Bands
- Ensuring Proper Band Fit
- Choosing the Right Band for Your Apple Watch
- Common Mistakes to Avoid When Changing Your Apple Watch Band
- Caring for Your Apple Watch Band
- What to Do if Your New Band Doesn’t Fit
- How Often Should You Change Your Band?
- Personalizing Your Apple Watch with Different Bands
- Where to Buy Apple Watch Bands
- Conclusion
- FAQs
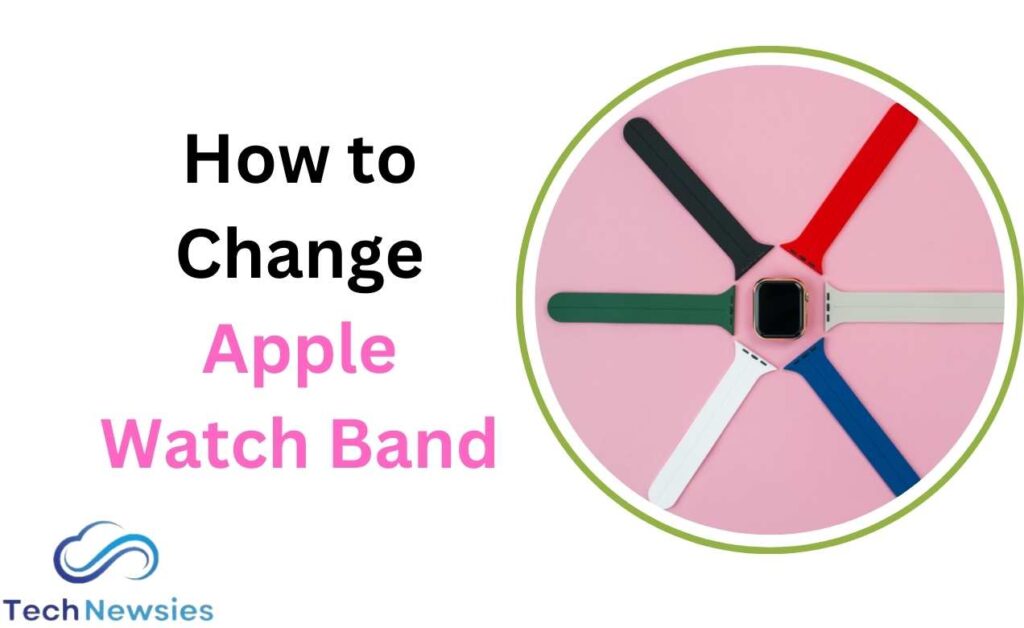
Understanding Apple Watch Band Types
Apple Watch bands come in a wide variety of materials and styles. The most common types include:
- Silicone/Sport Bands: Great for workouts and casual wear.
- Leather Bands: Perfect for a classic or professional look.
- Stainless Steel Bands: Ideal for formal occasions or those wanting a sleek appearance.
- Nylon and Loop Bands: Comfortable, adjustable, and suitable for everyday wear.
Knowing the type of band you have or want to switch to is important since the mechanism to remove and attach may vary slightly.
Tools You’ll Need
Good news! You don’t need any specialized tools to change your Apple Watch band. Apple has designed the process to be as simple as possible. However, it’s helpful to have a soft cloth to place your watch on during the change to avoid any scratches.
Prepping Your Apple Watch for Band Replacement
Before you start, it’s always a good idea to turn off your Apple Watch to avoid any accidental taps or touches on the screen. Also, wipe down the watch and the new band with a clean, lint-free cloth. Dust or debris could cause scratches or prevent the band from locking in properly.
How to Change the Apple Watch Band (Step-by-Step)
Changing your Apple Watch band is a straightforward process, but it’s worth following these steps carefully to ensure you don’t damage your watch or the band.
Step 1: Position the Watch Face Down
Place your Apple Watch face-down on a soft surface, like a microfiber cloth or a padded mat. This protects the screen while you work on the band.
Step 2: Press the Band Release Button
On the back of the Apple Watch, you’ll find two small, oval-shaped buttons near where the band connects to the watch body. These are the band release buttons. Press and hold one of these buttons firmly.
Step 3: Slide the Old Band Out
While holding the release button, gently slide the band out of its slot. You don’t need to force it; the band should slide out easily. Repeat this step on the other side of the watch to fully remove the band.
Step 4: Attach the New Band
Take your new Apple Watch band and slide it into the same slots where you removed the old band. Make sure the new band clicks into place. You should hear or feel a slight “click,” which indicates the band is securely attached.
Step 5: Check for a Secure Fit
After both sides of the band are in place, gently tug on the band to ensure it’s locked in. If it slides out easily, you haven’t attached it correctly. Recheck the release buttons and make sure everything is aligned properly.
How to Remove Different Types of Bands
Some bands, such as sport bands and loop bands, follow the same removal process, but others might require a bit more care.
- Sport Bands: These are the simplest to change. The silicone material makes them flexible and easy to remove.
- Loop Bands: Because loop bands are a continuous piece of material, you’ll remove them the same way but may need to unloop the band from your wrist first.
- Leather and Link Bands: These are more rigid, so take extra care when sliding them out to avoid scratches on the metal connectors.
Ensuring Proper Band Fit
Once the new band is in place, ensure that it fits comfortably on your wrist. Some bands are adjustable, like the Sport Loop, while others come in different sizes, so double-check that your band is snug but not too tight. A well-fitted band not only feels good but keeps your Apple Watch functioning correctly by maintaining proper contact with your wrist for features like heart rate monitoring.
Choosing the Right Band for Your Apple Watch
Not all Apple Watch bands are created equal. They come in various sizes, and not all bands will fit every Apple Watch model. Make sure you know your Apple Watch size before purchasing a new band. Look for options that fit the style of your daily life. For example, a silicone sport band may be perfect for workouts but may not suit a formal event. For versatility, consider buying multiple bands that you can swap out for different occasions.
Common Mistakes to Avoid When Changing Your Apple Watch Band
Changing your Apple Watch band is simple, but a few mistakes can occur. Avoid forcing the band into place if it doesn’t slide in smoothly, as this could damage both the band and the watch. Also, ensure that your new band is compatible with your specific Apple Watch model. Forcing an incompatible band into place can lead to frustration and potential damage.
Caring for Your Apple Watch Band
Your Apple Watch band sees a lot of wear and tear, especially if you wear it daily. Here’s how to take care of it:
- For Silicone/Sport Bands: Simply wash with water and mild soap.
- For Leather Bands: Avoid getting these wet, and occasionally condition the leather to keep it from cracking.
- For Stainless Steel Bands: Use a soft cloth to buff out fingerprints and minor scratches.
Regularly cleaning your bands will help them last longer and keep them looking fresh.
What to Do if Your New Band Doesn’t Fit
If your new band doesn’t fit or doesn’t lock into place properly, double-check that you’ve purchased the right size for your Apple Watch. If everything seems correct but it still doesn’t fit, the band may be defective. Contact the seller for an exchange or refund.
How Often Should You Change Your Band?
There’s no set timeline for how often you should change your Apple Watch band. However, if your band starts showing signs of wear, like cracking or discoloration, it’s time for a replacement. Some users also like to swap their bands seasonally or based on personal style.
Personalizing Your Apple Watch with Different Bands
One of the best parts of owning an Apple Watch is how easy it is to personalize. By simply changing the band, you can switch from a sporty look to something more professional or stylish. Experiment with different colors and materials to find combinations that work best for you.
Where to Buy Apple Watch Bands
You can purchase bands directly from Apple, but there are also plenty of third-party sellers that offer high-quality bands. Sites like Amazon, Etsy, and dedicated accessory stores provide a wider selection and often lower prices.
Conclusion
Changing your Apple Watch band is an easy way to keep your device looking fresh and matching your personal style. With just a few simple steps, you can remove an old band and replace it with a new one in minutes. Whether you’re upgrading for style, comfort, or function, the right band makes all the difference.
FAQs
- Do I need any tools to change my Apple Watch band? No, Apple Watch bands are designed to be changed without any tools.
- How do I know if a band will fit my Apple Watch? Check the size of your watch (38mm, 40mm, 41mm, etc.) and ensure the band is compatible with that size.
- Can I clean my Apple Watch band? Yes, most bands can be cleaned with water and a mild soap, but leather bands should avoid water exposure.
- How can I tell if my band is securely attached? You should hear a slight click when the band is properly secured, and it should not slide out when gently tugged.
- Can I wear my leather band while swimming? No, leather bands should avoid water, as they can become damaged when wet.

